Saturday, March 21, 2009

Milk & Rice

Rice pudding, ahhh... I love it. My Great Grandma Newman used to make an amazing rice pudding, I now know that it involves a whole lot of whole milk, instant rice, a giant bowl, and a really long time in the oven. I have to say that her pudding is different than any I've ever had since, baked rice pudding definitely has some different properties than stove top rice pudding. Really though, I like just about any rice pudding as long as it doesn't have plump, cooked raising laying about in it. I am even known to eat some Jell-o rice pudding if it crosses my path, which it can do, say, when you are babysitting at someone else's home. Of course it doesn't come close to competing with a real, good rice pudding. But it's still a rice pudding of sorts and I'll have it.


I won't elaborate more on Jell-o rice pudding, my time will be much better spent telling you about a wonderful rice pudding that I have made twice in the last two weeks. I am always trying new recipes of rice pudding. They usually are quite good, varying in different ways. Some call for eggs. Some don't. Some call for milk. Some call for cream. Some use Basmati, some use Jasmine. Molly Wizenberg wrote an article that was featured in the March issue of Bon Appetit and it was all about rice pudding. After reading the recipe, there were a couple things about it I liked about it right off the bat. I liked it's simplicity. Rice, water, cream, milk, sugar, salr, and a vanilla bean. I also liked that it calls for you to simmer and cook the rice in water for ten minutes until the water evaporates. This step seemed unique and something I haven't run into yet in all of my rice pudding endeavors.

Molly called for Basmati, which my pantry was out of, so I happily stepped out to the food co-op to get some rice from the bulk section. To my complete amazement and shock, the best thing happened while I was in the spice section. I was busy scooping out mustard seeds, cumin, and red pepper flakes when my eyes saw a container with long, dark vanilla beans it it. In all of my visits to the co-op over the years how could I not have known they sold vanilla beans in bulk??? I grabbed them quicker than a lightning strike and saw a little label on the side reading, $1.25 each. No. Can't be. Costco sells them three for twelve dollars. This is way too good to be true... So I ran up to the help desk to inquire, and sure enough, the price was right! This may sounds like the dorkiest thing ever, but I think that was the best news I've gotten since I heard that Obama won the presidency. So... I bought six. I even put a little section of vanilla bean in my morning coffee concoction every now and then. I'm getting crazy frivelous with my beans. I'm in vanilla heaven. Honestly. Isn't that amazing? Especially in these financially trying times? You just have to smile with glee when you come across such a little luxury as that. Okay, back to the pudding.


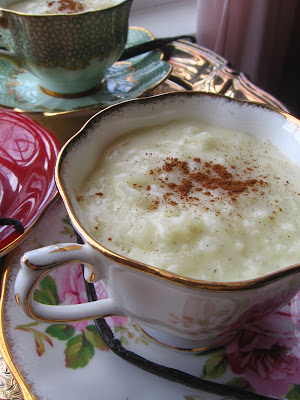
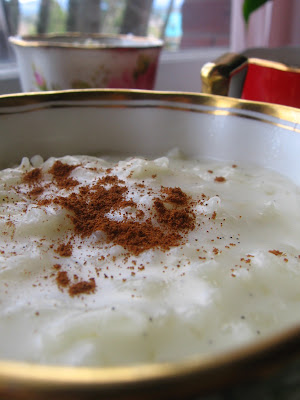
This rice pudding is perfection. It's so creamy and has such a lovely, milky taste. It's rich but not too much so. The pudding has a very pure quality because of the simple ingredient list. Then cooking the rice in water for awhile softens it up a an extra bit so that when you steep it in the milk for thirty minutes it just becomes so wonderfully tender and creamy. I love the sweet little vanilla seeds that are scattered throughout the pudding, sometimes, when you're lucky, you can feel a little speck crunch between your back teeth. I made another batch today because we are leaving to house sit this evening and I thought it the perfect way to use up the bottles of dairy in our fridge. Only today I played around a bit and used broken rice from the Asian market. I like the idea of taking sad little left-behind and damaged rice grains and putting them into a rich, silky sauce. Thanks to Molly, I now have a perfect go-to rice pudding recipe. Enjoy, y'all!


VANILLA BEAN RICE PUDDING

Molly Wizenberg

Ingredients


1 1/2 cups water
3/4 cup basmati rice
1/4 teaspoon salt
3 cups whole milk
1 cup heavy whipping cream
1/2 cup sugar
1/2 vanilla bean, split lengthwise

Bring 1 1/2 cups water, rice, and salt to simmer in heavy large saucepan over medium-high heat. Reduce heat to low; cover. Simmer until water is absorbed, about 10 minutes. Add milk, cream, and sugar. Scrape in seeds from vanilla bean; add bean. Increase heat to medium; cook uncovered until rice is tender and mixture thickens slightly to a soft, creamy texture, stirring occasionally, about 35 minutes.

Remove pudding from heat and discard vanilla bean. Divide pudding evenly among small bowls. Serve warm or press plastic wrap directly onto surface of each pudding and chill thoroughly. DO AHEAD. Pudding can be made 2 days ahead. Keep refrigerated.

Trophy

Whenever I make a trip down to Seattle, it usually isn't complete without a stop to Trophy cupcakes. I LOVE cake and these little cuties tend to be my favorites down there. I think Cupcake Royale's are very dry and not very good. I like Trophy's much better overall. But...


As good as they are (I'm starting to cower down a bit, like a dog whose used to getting smacked around, shoulders drooped, looking up in fear and angst) I don't think they are as great as I used to think. I know a lot of people are going to disagree with me here. Especially my dear friend Mallory. But I just have to go here. I think the shoppe is darling and the branding and concept delightful. But when it comes to the cakes, I just have a couple of issues. Let me preface this by saying that for the most part I really enjoy them, I just think they could be improved on a bit. For starters, whenever I go, which is on Sunday afternoons, the majority of the flavors involve chocolate. I love chocolate. But chocolate on chocolate, vanilla on chocolate, peanut butter on chocolate, Guinness chocolate, and red velvet, it's just too boring! I know, I know, red velvet isn't technically chocolate, but to me, it is. So, we did our best to get a variety and ended up choosing lemon coconut, chocolate with peanut butter icing, chai cardamom, and espresso with Bailey's Irish Creme icing. I thought the lemon was okay but not a wower. Then we shared the coffee cupcake which was dry, dry, dry. As well, the chai was pretty dry. Hey, that rhymed.


Now, I'm really going to be bad and go where many wouldn't dare. I don't like how most places use their icing. A big plop of it on top may be cute, but it certainly doesn't seem functional. For one, its hard to eat a cupcake that is four inches tall with such a bouffant of icing. And here's the real deal breaker for me, I despise the way that the cake dries out on the outer rim because the icing doesn't cover the surface entirely consequently leaving exposed cake. "But just a little of it is dry." you say. Well, I say no part of any cupcake should be dry. Not even it's tiny little rim. My first commercial cupcakes were eaten at Magnolia's in NYC and this is the way I choose to ice my cakes. A thinner, even layer swooped over the entire surface of the cupcake. Not only does it look elegant and old-fashioned, it offers an even amount of icing for every bite, and it acts as a insulator keeping the cake moist and fresh.


So, I'm sad to say that Trophy Cupcakes moved down a couple of notches for me. But, I still do like them. My complaints being dryness and too much icing and not enough variety, they still are pretty good for commercial cupcakes and probably my favorite in Seattle. But nothing seems to beat the perfection of a homemade cupcake prepared just the way I like it.

Rainbow Trout


I should report that, lately, it would seem that Ethan and I haven't been eating so well. We have been taking the lazy, cheap way out of things and as a result, have starting feeling kind of toxic! After wallowing around in self-misery and shame for a few days, I bucked up and decided it's time to get with the program. I mean for goodness sake, I went to one of the best whole foods/nutrition-centered culinary schools in the country. I know more than most about what is best for the body and best to cook in the kitchen. But still, with all that knowledge it's easy to let convenience sneak its way into your life and your kitchen and ultimately, your belly. So, I set out to meander through the co-op and find some healthy inspiration.


I hit the produce section first. I selected two different kinds of chard, broccoli that was on sale, red peppers, and some sweet potatoes. While I was working my away around the perimeter of the store I came across the deli and some adorable little fish. I remember one time when my Dad and I went fishing at this little pond and caught a few rainbow trout. I know we took them home and had them for dinner. I also remember that they are delicious. The last time I had rainbow trout was a couple year ago when Ethan and I had dinner and Campagne down in Seattle. It was good then too. Anyway, the deli girl and I picked out the two prettiest and most colorful fish and I was on my way.


It felt so good to actually cook whole, healthy foods for a change. I think I'm starting to come to a simple approach to eating and cooking. My goal is to just bring out the essence of the ingredients and keep them the way I think they intend to be. We seared the trout in butter and olive oil and just kept it super simple with salt and pepper. The chard was sauteed with lots of garlic and then got a splash of oil and vinegar at the end. And for the sweet potatoes, they were just cubed and roasted with a sprinkling of brown sugar and a little bit of butter. I think we are going to start eating in a lot more from now on. I'm excited.

A Real Gem

Before I get back to posting and adding to this poor little blog that has been put up on the shelf for the last couple of weeks, I have to say thank you to a lovely girl over in Winnepeg and a gentlemen in the UK. I love how the internet brings us all together.

Anyway, a few weeks ago, I discovered that the photos I had been using on my blog were no longer available for me to use (long story) and was pretty much without a banner of any kind for the last couple of weeks. I was telling my friend Mallory about this small tragedy and she recommended that I go to Etsy and look around because apparently there are lots of people on there who will design banners for very reasonable rates.

So, sure enough, I looked around and came across a stylish artist named Leigh-Ann Keffer of Freckled Nest and she agreed to do business with me. After much searching for the right photo, which we found on Flickr and belongs to the gracious Dilip Ramachandran who kindly offered it to me to use for the banner, Leigh-Ann and I worked together to create the look.

Leigh-Ann was so sweet and easy to work with and dealt beautifully with all of my input and wants. I had a lot of input. So, here my blog is with a new name and a new cover. Thank you two for sharing your talent with me! My blog and and I are very grateful!

Monday, March 02, 2009

Raspberry Thumbprints

I'm just a huge fan of thumbprint cookies. Enhanced shortbread. What's not to love? Raspberry, chocolate, apricot... I don't discriminate. I love the dense, crumbly texture, the simple buttery taste, and the puddle of preserves that camps out in the center. I'm sure there are better or more gourmet recipes out there but this one does the trick just fine. They are simple, tasty, and only have five ingredients. As Ina so often likes to say, 'who wouldn't love that?'


CLASSIC RASPBERRY THUMBPRINT COOKIES
adapted from Martha Stewart
makes 14 large cookies

24 tablespoons (3 sticks) unsalted butter, room temperature
1 cup sugar
1 large egg
3 1/4 cups all-purpose flour (spooned and leveled)
3/4 cup jam (any type)


(I add a couple pinches of salt, you can also add a couple drops of vanilla or almond extract)


Preheat oven to 350.
In a large bowl, using an electric mixer, beat butter and sugar until smooth.
Add egg, and beat until completely combined.
With mixer on low, add flour, and mix just until incorporated. Make sure butter is evenly distributed through batter otherwise some of the cookies will bake off oddly, some having too much butter and others not enough...
Using a medium-size scoop, scoop out six to eight cookies onto a parchment-lined baking sheet leaving a few inches between for spreading.
Moisten thumb with water, and gently press the center of each ball, making an indentation about 1/2 inch wide and inch deep.

I chose to chill the cookies for about ten to fifteen minutes because I didn't like the way they spread in the oven being at room temp. Chill if you want that rounded, defined look.
Bake until cookies are light golden brown around edges of base, 18-22 minutes.
In microwave or on stove, heat jam until liquefied; spoon jam into each indentation until full. Transfer to a wire rack, and let cool completely.
If storing, place in an airtight container at room temperature, up to 2 days.